Stamped concrete, frequently called textured or imprinted concrete, replicates stones, such as flagstone, slate, tile, brick, and wood. The wide selection of pattern and color options make it popular for beautifying patios, swimming pool decks, driveways, and more. It is also an affordable paving option that needs less maintenance than other materials. Due to its superior durability and weather resistance, colored and stamped concrete is the perfect choice to bring the luxury look of stone, wood, or brick to patios, driveways, pool decks, courtyards, and walkways. Explore these 43 stamped concrete patio design ideas and see for yourself!
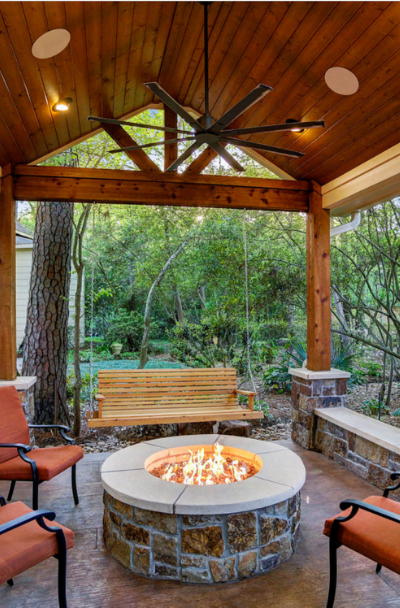
RUSTIC PATIO
A gas fire pit under a wood surface makes this rustic patio look simple but beautiful.
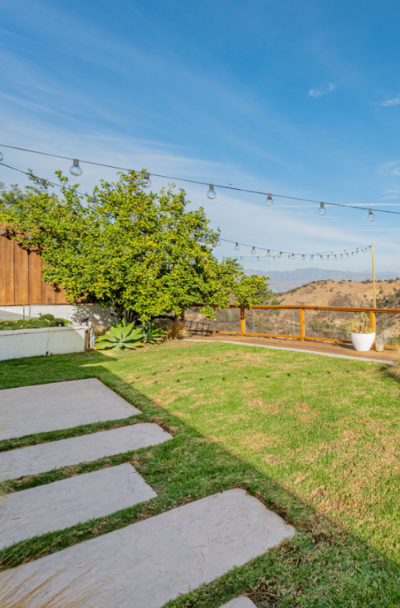
HARBOR INSPIRED

This simplistic design patio lets the greenery view take the limelight.
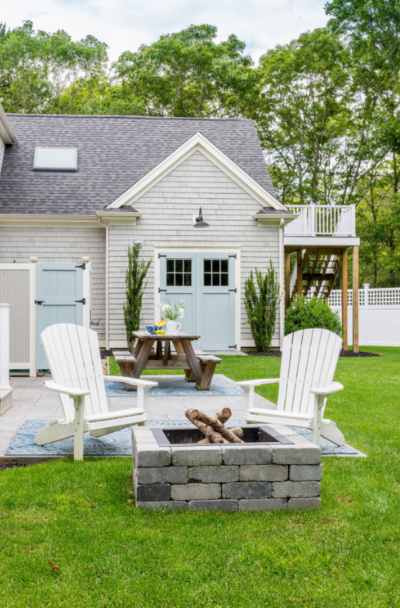
DECK + FIREPIT

A beautiful multicolored stamped concrete patio that looks cozy and cute.
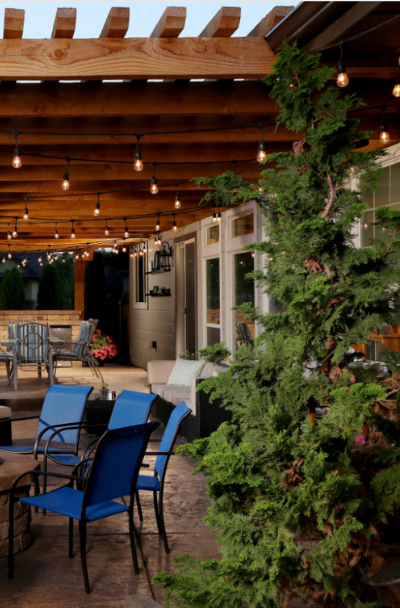
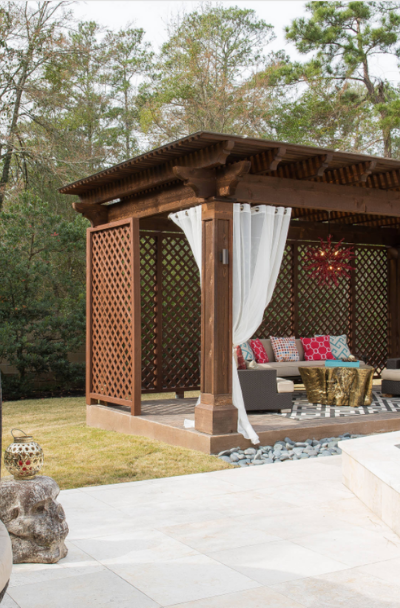
CRAFTY

The minimal greenery decor and the pergola add a great finishing touch to this Craftsman Patio.
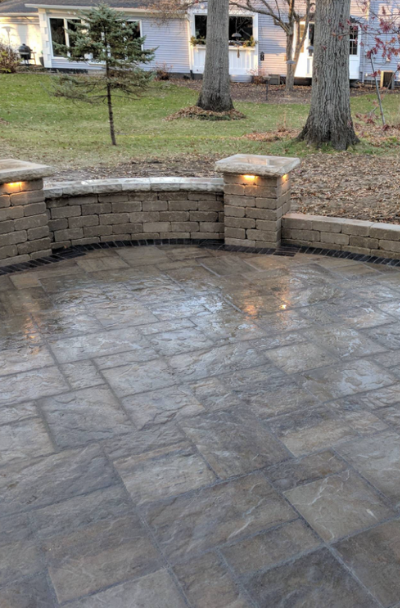
TRENDY

A fire pit with a circular formation makes this stamped concrete patio perfect for a large family gathering.
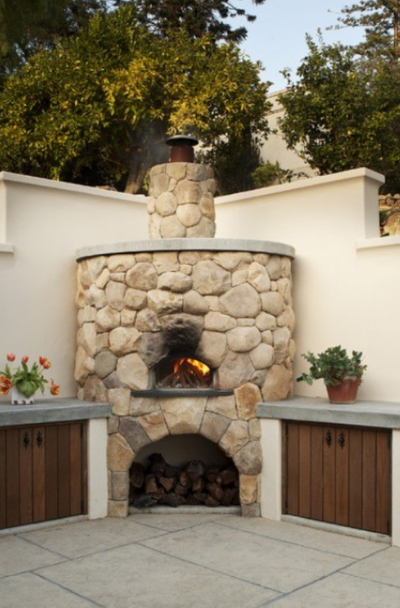
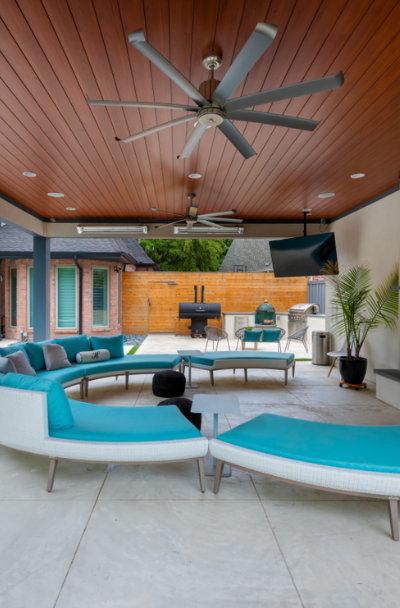
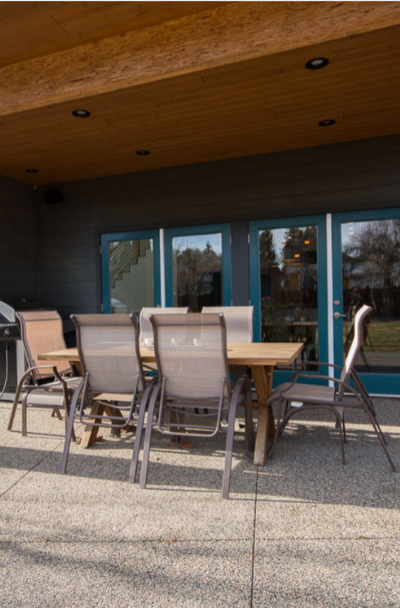
70’S LOOK
A covered modern patio with a beautiful fireplace and a mini kitchen on the side.
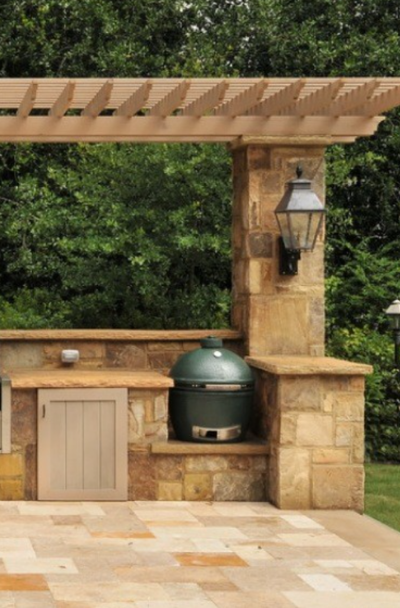
MEDITERRANEAN
An outdoor patio kitchen with a fresh and clean look.
MID-CENTURY
Two light posts on each side of this stamped concrete patio kitchen give a warm outdoor feel.
CLASSIC
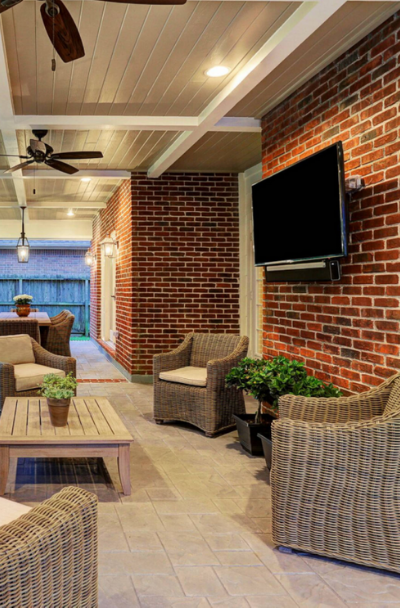
This traditional patio makes a cozy outdoor living space.
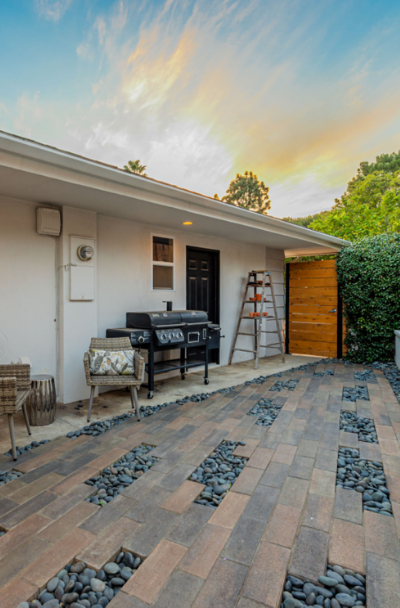
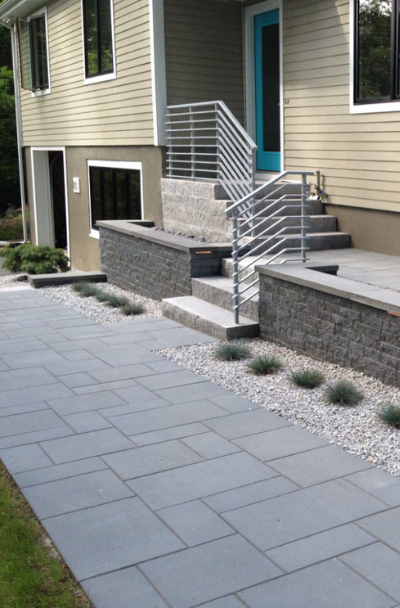
HARBOR INSPIRED
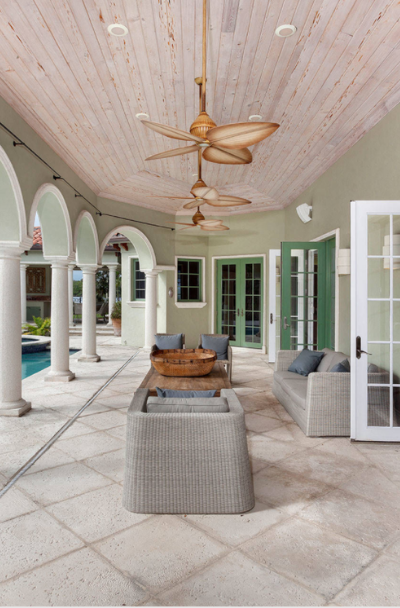
The concrete flooring complements well the white and green door and walls.
Why Invest In A Stamped Concrete Patio
Stamped concrete is the new standard for patios. This material’s versatility is unmatched; by balancing color ratios and mixing and matching the dozens of stamped concrete patterns available, your imagination is the only limit. A stamped concrete patio also starts with a poured slab, however, with the extra step of texturing with concrete stamps. A stamped concrete slab is a lot more challenging than a traditional broom-finished slab. Therefore, it is ideal to entrust the job to a contractor. Timing is of the essence here. Based on the slab’s dimensions, it might take a team effort to maximize this particular step. Fine detailing, touch-ups, and joint installation (to restrict cracks) guarantees a seamless look and durability. From pouring to sealing, a stamped concrete patio can take a few weeks to complete.
From a visual perspective, stamped concrete is challenging to beat regarding design and style choices that are practically limitless. Many people take inspiration from their home’s architectural style or surrounding landscape and select patterns and colors that blend well with the existing tile, stone, and textured concrete elements. For example, if your house features a brick exterior, think about echoing that theme with a basic brick-patterned border, or select a pattern and color pattern that ties in together with your surrounding landscape. The most famous kinds of stamped concrete are natural stone patterns, including slate, fieldstone, and flagstone. Brick, cobblestone, and wood stamped concrete patterns follow directly behind.
Additionally, there are seamless concrete stamps that offer texture but without joint patterns. Patterns can also be pressed into the concrete in complex projects with fountains and steps. The most preferred colors for a concrete stamp are grays and earth tones. However, brick patterns are usually colored in russet or red hues. Colors can be layered, mixed, or antiqued with tints or stains, creating an endless list of options. Multiple colors can be utilized within the same task for realistic stone coloration, ornamental borders, or a contrasting color design. How much does stamped concrete cost? A stamped concrete cost may vary depending on the expenses for labor and materials and the intricacy of the project, but the old saying, “you get what you pay for,” truly holds. With stamped concrete, you will get a surface that will last longer and involves less upkeep than other materials, which can add up to considerable cost savings over its lifetime. You will also add aesthetic value and curb appeal to the house, making it possible to maximize your investment return. Basic stamped designs with one pattern and color range from $8 to $12 per square foot, mid-range projects with contrasting patterns or borders can range from $12 to $18 per square foot, and high-end custom projects cost $18 or more per square foot.
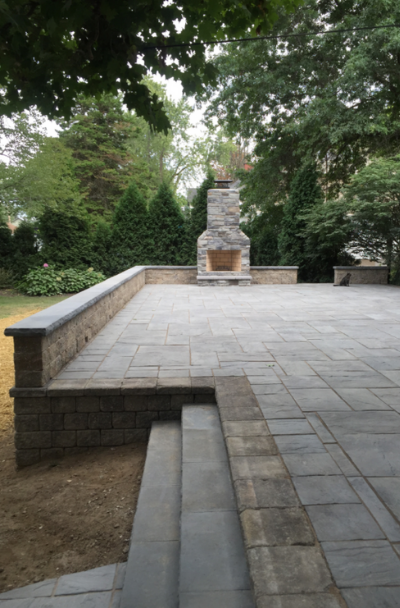
TIMELESS

Traditional stamped concrete patio with an outdoor fireplace that is perfect for chilly night fun.
CUSTOM HOME

An extended timeless kitchen patio with Techo Bloc Aberdeen pavers on the flooring.
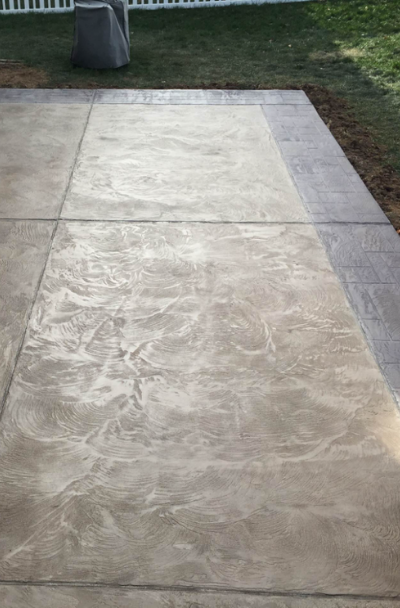
FARMHOUSE

Perfect combination of the wooden and rock walls with concrete flooring and sand finish.
LUXURY
A transitional backyard stamped concrete patio with an amazing overlooking view.
Why Invest In A Stamped Concrete Patio
You will find many steps about how to stamp concrete. Unlike when applying a stain or decorative coating to hardened concrete, the workers must complete the entire concrete stamping process before the fresh concrete sets. Contractors must be experienced, structured, and adequately prepared to do the job effectively.
The first step is to apply a color hardener. Once the concrete gets to the right stage of plasticity (usually when there is no bleed water on the surface), spread the color hardener by tossing it onto the surface from the waist or a bit lower to decrease the material drifting into the air. Once the first shake of color hardener has been applied, give it five to ten minutes to absorb water from the concrete, and float it into the surface. After bull-floating the first application of the color hardener, do the same steps, and apply the second coating to ensure complete coverage. Then use a release agent. Liquid or powdered release agent serves two essential purposes. They import subtle color contrast while serving as a bond breaker to prevent the concrete stamps from adhering to the concrete surface and disturbing the imprint texture. The most effective way to utilize a powdered release is by using a dry Tampico brush approximately eight inches wide. Dip the brush into the release agent’s pail and fluff it to load the bristles and coat them equally. Next, take the brush near the handle, keeping it under belt level, and use your wrist to flick the release agent onto the surface in a soft, uniform layer.
To utilize a liquid release agent, use a pump-type sprayer to apply the release agent in a uniform coating onto the concrete’s surface right before you stamp. If you’re planning to utilize a tinted liquid release agent, add the tint one day or two beforehand, if possible. This can let the pigment particles completely dissolve. Then, test to see if the concrete is ready. Before you begin stamping, check to see if the concrete has reached the right stage of plasticity. If you start stamping very late, not only will concrete stamping require more work, you will also produce little or no texture with the stamps, especially as you get to the end of the task. Press your finger into the concrete surface at several spots on the slab. And if you leave a clean imprint, about 3/16 to ¼ inch deep, then you can begin stamping. An alternative test is to place a stamp on the concrete and step on it. It must hold your weight and not slide around or sink very heavily into the surface.
BACKYARD
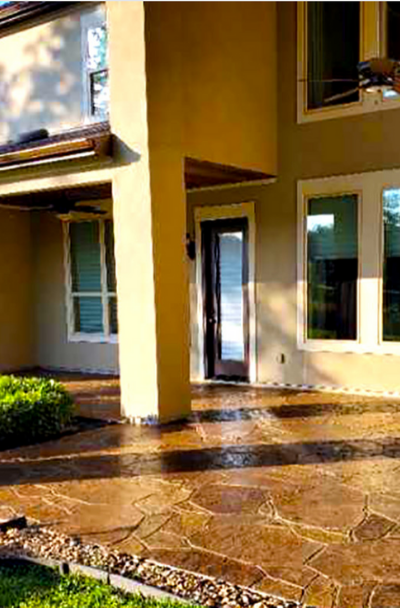
A stunning flagstone stamped concrete patios with classic brown color.
TRANSITIONAL

The beautiful gazebo gives an open view of the surrounding area in this stamped concrete patio kitchen.
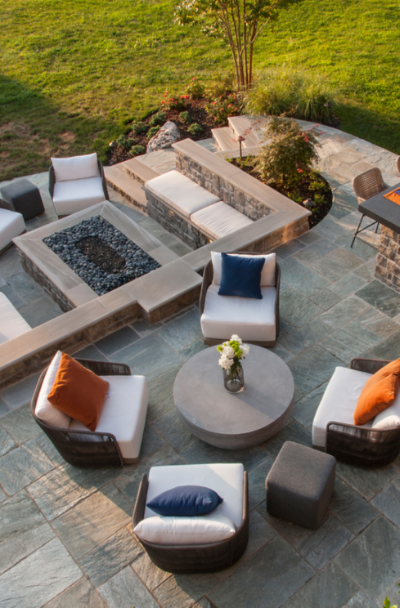
RANCHO
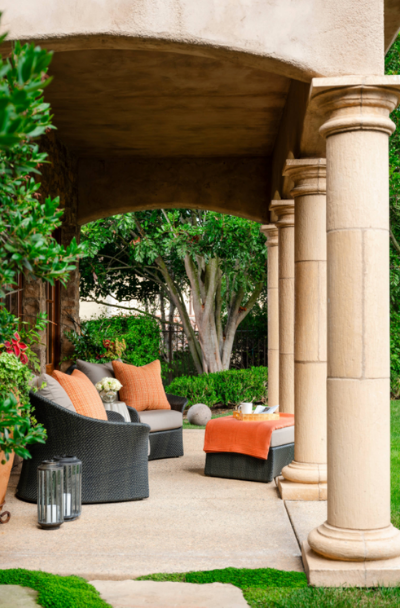
The touch of an orange outdoor pillow adds a perfect contrast to each garden decor.
OUTSIDE BAR

Mini outdoor bar with concrete flooring for this traditional patio.
ESTATE
The racks section on the concrete flooring adds extra character to a patio area.
SUMMIT

Open stamped concrete patio with old-fashioned garden furniture and accessories.
Tips In Stamping Concrete
Pretexture along the slab’s perimeter edges about six to twelve inches inward with a flex mat or textured skin. This is crucial because when you’re working with a non-flexible stamp, the tool will overlap the edge of the form, and you won’t be able to depress it into the concrete thoroughly. With pre texturing, you’ll get the texture you need and the full color from the release. After the edges are pre textured, the crew can begin stamping the rest of the slab with the concrete stamps. In general, you need to stamp in the same sequence you placed and completed the concrete. If you started placing the concrete at the slab’s top left-hand corner and ended on the bottom right corner, this would be the ideal sequence to use for finishing and tamping operations.
The stamping crew must complete the first row before going on the second one. Usually, someone will place the starter tools and stand on them while getting stamps in the first row and leapfrogging them into another row. While this particular individual is moving and advancing the tools, somebody else can perform the stamping. Based on the stamp pattern, a third person might be required to detail the grout joints. As stamps are positioned, have somebody stand by with a hand roller to touch-up joints where needed. Do detailing work as necessary. Even if you’ve pre textured the edges and used a flex mat against walls, you’ll often find it necessary to do a little detailing with a hand chisel, roller, or texture skin. This is done to remove displaced cement paste that arises through the joints between stamps, to fix any blurred pattern lines, and to fix grout joints where the stamp was not tamped down with enough pressure. With most stamp patterns, you will get better success if you detail on the same day.
Then remove the residual release agent and apply the curing compound. If you have used a colored release powder to the concrete, you can’t apply a curing mixture until you wash off the residual release agent, at least one day and in some cases two to three days later, based on the weather conditions. Once the surface is cleaned and dried, you can spray on a liquid membrane-forming curing mixture or a cure and seal to preserve moisture in the concrete. If you’re using a tinted or clear liquid release, you can apply the curing membrane to the slab the same day. Cutting the contraction joints at the appropriate spacing and depth in the slab shortly after placement provides stress relief at planned areas and prevents uncontrolled random cracking. One can form joints in the concrete as it starts to set using a groover, or one can wait to cut the joint until after the concrete set utilizing a saw equipped with a diamond or abrasive blade. In general, a sawed joint is much less apparent than grooving. After that, you can now seal the concrete. After the slab has cured sufficiently, you need to use a finish coat of sealer. Most manufacturers suggest applying the sealer a few weeks later, after a gentle surface cleaning. See to it that you do not apply the sealer too heavily, which could trap moisture within the slab. The best methods for using a sealer are combining rolling and spraying, particularly once the stamped concrete pattern has deep grout lines. Going back over the concrete surface with a roller where needed helps to distribute the sealer uniformly.
MEADOW
The overflowing water in the middle of the table gives a dramatic effect.
COUNTRY
Mountain style stamped concrete patio with a cozy gathering spot for friends and family.
OUTDOOR
The pergola and the outdoor furniture look cozy and relaxing.
YARD
A contemporary stamped concrete patio with an impressive and functional outdoor entertaining space.
SHOWCASE
The high ceiling with comfy furnishing looks excellent with the stamped concrete flooring.
LANDSCAPE
This neat narrow landscape and patio design looks simple but elegant.
GREENY

A simplistic patio with a classic natural color floor and chair.
CAPE COD
Even small spaces can create a functional stamped concrete patio.
DIMENSIONAL
This traditional stamped concrete patio gives a unique style to any home.
BEACH & STYLE

The blue outdoor pillow matches the refreshing ocean view in this stamped concrete patio
OPEN GABLE

Spacious stamped concrete patio with open gable perfect for large gatherings.
CONTEMPORARY
Simple but modern outdoor kitchen with stamped concrete flooring.
STAINLESS STEEL
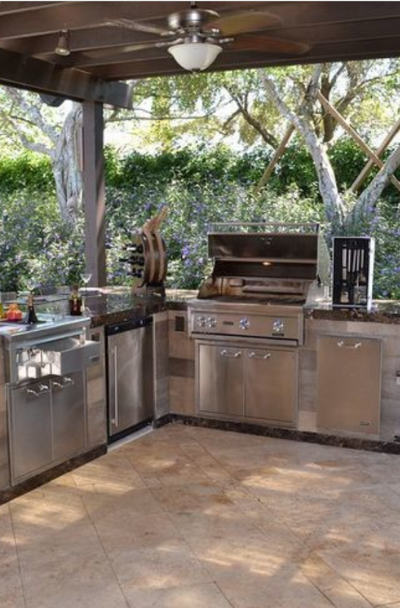
The appearance of the luxury concrete stamped with beautiful stainless kitchen appliances.
HARDSCAPE
In multiple sizes, this stamped concrete flooring makes this patio appear larger than it is.
COASTAL SIDE

This eye-catching stamped concrete patio with a beachfront view looks refreshing and relaxing.
ENCLOSED PATIO
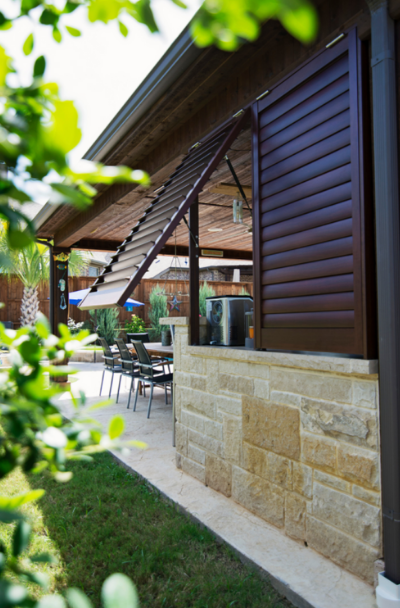
An enclosed patio with fully operative Bahama Shutter.
LAKEFRONT
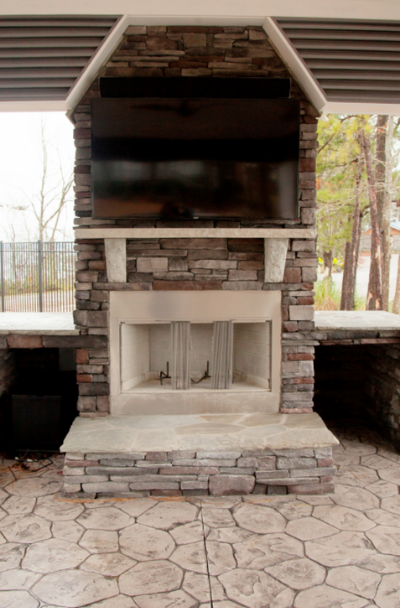
This patio has a polished white flagstone that matches perfectly with the white fireplace.
SEALED

An ashlar cut slate with an AR350 Satin Sheen Sealer.
PATIO + FIREPLACE

A stunning custom made firepit in this Fiber-optic stamped concrete patio.
MODERN
This modern stamped concrete patio has three different section areas perfect for gatherings.
TUSCAN
Even concrete flooring can look luxurious with proper stamping.
SOUTHWESTERN

A huge southwestern stamped concrete patio with a beautiful landscape and a breathtaking view.
Stamped Concrete Driveway
A stamped concrete driveway offers many decorative options not possible with other paving materials. Utilizing concrete stamps combined with coloring agents, you can create cost-effective, realistic replicas of popular materials like brick, cobblestone, flagstone, and natural slate. Whether it has contrasting borders, looks like cobblestone, or has a broom finish, it will instantly boost your house’s curb appeal. And this improved attractiveness will immediately help the resale value. There is no reason not to have a stamped concrete driveway if you’re going to use concrete. If you’ve been confident that a stamped concrete driveway will be the way to go, you might be curious about what sort of style choices are out there. You can see here ideas that you can use to get your imagination running as you design your new driveway. Use a single tile or cobblestone stamp to make a uniform look across your whole driveway for a simple, classic look. Create contrast by stamping borders around the edges of your driveway. Next, use finishes and paints to let it pop. Incorporate several complementary stamped designs, alternating between borders, squares, and bands. Your imagination is the only limit regarding what you want your stamped concrete driveway to look like. With an endless amount of design choices, finishes, textures, and paint colors, you can build a look that suits your property regardless of the style.
Please Share Our Work
” We are very passionate about educating homeowners. From design ideas to hiring a contractor, we hope this blog helps you in your project process. ” ~ Jim Casali